Lang File Instructions
The language file (lang for short) is a file from which all text is referenced in-game. This can be freely edited by the player.
Editing the lang is actually a simple process:
- Locate your folder for Nuclear Throne. On Steam this is by default located at 'C:\Program Files (x86)\Steam\steamapps\common\Nuclear Throne'
-
There will be a file called 'lang-example', which is the template.
Make a copy and rename it to just 'lang'.
- If file extensions are showing, this will be saved as 'lang.ini'. If file extensions are off, then just having it saved as 'lang' is fine.
- The lang file can be opened with any text editor program to be edited, such as Notepad. The sections below will further detail specific editing.
- Update 100: Once saved, the edits can be seen in-game by swapping to it under the 'Language' settings menu.
- There is an option to change the display name in the language menu near the top of the lang file.
- Update 99: Once saved, the edits will be seen in-game automatically when launched.
- Be sure to create a backup of lang edits to not lose your work.
Update 100 also has a dedicated lang folder. Putting the lang file into this folder with any file name will have it be recognized, allowing for multiple lang files available on the in-game list at once.
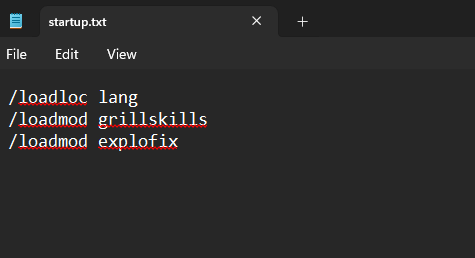
For NTT usage: Running the command '/loadloc lang' will load the lang file into that session. If you want the lang to load every time the game is launched create a file called 'startup.txt.' in the mods folder. Write in this folder the same command you would use in-game, being '/loadloc lang', and save. Example:
Lang File Editing
The lang file is split up into categories, with each category name in brackets. While anything in the lang file can be edited, only edit things AFTER the = (equal sign) on any line, as this is all the text that actually appears in game - everything before the equal sign is classification which directs the game on when to display that text.
As of update 100, additional line for screen tips can be added for any category. Simply make a line break, copy the line from above and paste it onto the new line, increasing the tip number by one. Older versions will not display extra lines.
The font used in-game is the 'Press Start' font, though likely a modified version. This is a font that only supports base ASCII characters, so any text edits using other Unicode characters will not appear in-game. Only 'Press Start 2P' font supports other Unicode characters which is used in fan projects, but not within NT itself.
Text can also be highlighted using colors. Use @ then a letter from the list below to signify what color it should be. @s is used to end the highlight there - though what it's actually doing is resetting the color to the default, being Silver. Multiple colors can be used within the same line.
- @s for the color silver (default color)
- @d for the color dark gray
- @w for the color white
- @r for the color red
- @b for the color blue
- @g for the color green
- @y for the color yellow
- @p for the color purple
Adding custom colors is slightly more complicated, fully explained in another fan-made guide.
There are a few other non-color effects which can also be used. These may not function in every part of text editing, but definitely will for screen tip edits.
- @q will make text shaky, it is used for cursed weapon screen tips. Putting @q repeatedly will increase the shakiness.
- @0 for a weird fish symbol.
-
@(sprite) inserts a sprite into the text. A full list of sprites can
be found here.
- Advanced options for sprite usage can be found here.
- # can be used as a line break, but only if the entire line is surrounded in quotation marks e.g. "A BARE HEAD#IS A FAIR HEAD"
Lang File Categories
The following list will cover many categories from the lang file, though not fully comprehensive. Ctrl+F can be used to search the text document and quickly jump to a category, this list is not in order of how they appear in the lang file.
-
[Races] refers to mutants.
- Name, Passive & Active are all seen from the character select screen.
- TB & Ultras are shown during mutation select screens.
- (ID 0 is used for Random character, while its ultras are used to store the co-op options.)
-
Text seen during level transitions:
-
[Tips] includes most screen tips, which appears during level
transitions.
- (Screen tips for Skills, Crowns & Weapons are all listed in their respective categories instead.)
- [GenCont] is the loading screen text.
-
[Tips] includes most screen tips, which appears during level
transitions.
-
Text seen in-game:
- [Weapons] will list all the weapon names upon walking over them and their screen tips. Not all weapons have screen tips by default.
- [Ammo] specifies the ammo type whenever ammo is gained.
-
[HUD] is for on-screen text when on low/no pickups, and other
misc. elements.
- 0 is Melee, 1 is Bullets, 2 is Shells, 3 is Bolts, 4 is Explosives and 5 is Energy.
- [Pickups] is used for the on-screen text when at full pickups, and what numbers appear when gaining pickups visually.
- [Bosses] is the text that appears during boss intros, if toggled on in settings.
-
Text seen on selection screens:
- [Skills] is for mutations. This includes the name/text on the mutation select screen, as well as their screen tips.
- [Crowns] similarly lists the name/text on the crown select screen, as well as their screen tips.
- [LevCont] is all the other text that appears on mutation/crown select screens and level up text.
-
Text seen on the pause menu:
- [PauseMenu] is the menu navigation buttons seen on pause.
- [Area] is the current area that appears on the pause menu and game over/victory screens.
- [ModeNotice] is to signify special runs on character select and the pause screen, such as hardmode.
-
Text seen on the game end screen:
- [GameOver] includes all of the text seen on the game over and victory screens.
- [CauseOfDeath] is used on NTT. On the game over screen the death source can be hovered over to see its name.
-
Text seen on the main menu:
- [MainMenu] is for all the buttons on the main menu.
- [PlayMenu] is the second menu pulled up upon hitting the 'Play' button.
- [Stats] is used for everything seen in the stats menu. The actual numbers can only be modified via save editing.