This page is a WIP! Formatting may change wildly and information may not be completely accurate. |
Enemies Overview
Page Contents
This page will be a comprehensive list of enemies and their tech at a later date. For now, just their statistical data is listed.
A sub-page for any death causes in the game can be found here. Another sub-page for full enemy HP lists in loop will be created at a later date.
Enemies will be ordered by their first appearances in preloop. An overview of enemies in each area can be found on the area page, with brief enemy descriptions.
Column Classification:
- Enemy: Lists their name and idle sprite (or walk sprite if they do not idle).
- Damage: Lists all their damage types.
-
Base HP: How much HP an enemy has on L0.
- For loop-specific enemies, 'Base HP' is included for the sake of HP calculations.
-
Loop Scaling: Enemies will gain 5% of their base HP for every
loop, while bosses gain 5% of their base HP
multiplied with an extra 33% (or 80% for Big Dog). Exact
Formulas:
- For Enemies: BaseHP * (1 + (1 / 20) * Loop)
- For Bosses: BaseHP * (1 + (1 / 20) * Loop) * (1 + (1 / 3) * Loop)
- For Big Dog: BaseHP * (1 + (1 / 20) * Loop) * (1 + (4 / 5) * Loop)
- Speed: How fast an enemy movies after friction is applied, for practical usage.
-
Drops: How likely the enemy is to drop something:
- Pickups: The chance of ammo/health dropping from an enemy. This percentage is affected by a modifier based on current ammo levels.
- Weapons: The chance of a weapon dropping from an enemy from the current pool. This is a fixed chance and is not affected by any modifiers except for Crown of Guns and Heavy Heart.
- Rads: Guaranteed to give the listed amount. All enemies will give +1 while playing Melting and -1 while running Crown of Blood.
- Description will go into all enemy behaviors, as well as boss scaling behaviors. Random sparse information will be added for the time being.
Enemies List
Desert |
||||
Bandit |
3 Projectile Damage | 4 HP | Speed: 2.6 | 2 Rads 1 Pickup (16%) |
Special Spawns: Enemy Behavior: |
||||
| Maggot |
1 Contact Damage | 2 HP | Speed: 1.6 | 1 Rad |
Enemy Behavior: |
||||
|
Rad Maggot |
1 Contact Damage | 2 HP | Speed: 2.1 | 2 Rads |
Special Spawn: Enemy Behavior: |
||||
Maggot Nest
|
None | 12 HP | Speed: 0 | 5 Rads 1 Pickup (100%) 1 Weapon Drop (35%) |
Enemy Behavior: |
||||
Big Maggot
|
1 Contact Damage | 22 HP | Speed: 0.6 2.6 (Rage) |
10 Rads 1 Weapon Drop (5%) |
Enemy Behavior: |
||||
Scorpion |
5 Contact Damage 2 Projectile Damage |
15 HP | Speed: 3.6 | 10 Rads 1 Pickup (15%) |
Enemy Behavior: |
||||
Gold Scorpion
|
5 Contact Damage 2 Projectile Damage |
37 HP | Speed: 2.6 | 30 Rads 1 Pickup (100%) 1 Weapon Drop (10%) |
Spawning: Enemy Behavior: |
||||
Big Bandit
|
10 Charge Damage 3 Projectile Damage |
100 HP | Speed: 2.6 4.6 (Charge) |
30 Rads 2 Pickups (200%) |
Spawning: Enemy Behavior: Loop Scaling: |
||||
Sewers |
||||
Rat |
2 Contact Damage | 7 HP | Speed: 3.6 | 4 Rads |
Enemy Behavior: |
||||
Green Rat |
2 Contact Damage | 4 HP | Speed: 4.1 | 1 Pickup (20%) |
Special Spawn: Enemy Behavior: |
||||
|
Big Rat (Rat King) 
|
1 Contact Damage 5 Charge Damage |
35 HP | Speed: 1.6 5.6 (Rage) |
20 Rads 1 Pickup (12%) 1 Weapon Drop (16%) |
Enemy Behavior: |
||||
Gator |
1 Projectile Damage | 12 HP | Speed: 2.6 | 8 Rads 1 Pickup (16%) |
Special Spawn: Enemy Behavior: |
||||
Buff Gator
|
4 Projectile Damage (Flak) 1 Projectile Damage (Pellet) |
30 HP | Speed: 3.1 | 12 Rads 1 Pickup (32%) |
Special Spawn: Enemy Behavior: |
||||
Ballguy |
2 Projectile Damage | 5 HP | Speed: 2.6 | 5 Rads 1 Pickup (20%) |
Enemy Behavior: |
||||
Toxic Ballguy
|
2 Projectile Damage 3 Toxic Damage |
21 HP | Speed: 2.1 | 8 Rads 1 Pickup (80%) |
Special Spawn: Enemy Behavior: |
||||
Assassin
|
5 Melee Damage | 7 HP | Speed: 2.6 |
8 Rads (16 Rads while hiding) 1 Pickup (20%) (No pickups while hiding) |
Enemy Behavior: |
||||
|
Mom (Frog Queen) 
|
10 Contact Damage 5 Projectile Damage (Main Toxic Ball) 3 Toxic Damage 2 Projectile Damage (Death) |
350 HP (Base) 490 HP (Loop 1) |
1.7 (Base) | 100 Rads 3 Pickups (100%) |
Enemy Behavior: |
||||
Scrapyards |
||||
Raven |
3 Projectile Damage | 10 HP | Speed: 3.1 | 4 Rads 1 Pickup (20%) |
Enemy Behavior: |
||||
Salamander
|
1 Contact Damage 2-6 Damage per. Flame |
25 HP | Speed: 2.1 | 12 Rads 1 Pickup (30%) 1 Weapon Drop (10%) |
Enemy Behavior: |
||||
Sniper |
3 Projectile Damage 5-10 Explosive Damage (Death) |
6 HP | Speed: 1.1 | 8 Rads 1 Pickup (40%) |
Enemy Behavior: |
||||
Big Dog |
3 Projectile Damage 5-10 Explosive Damage (Death) |
300 HP | Speed: 0.6 | 90 Rads 1 Weapon Drop (100%) |
Enemy Behavior: |
||||
|
Big Dog Missile (ScrapBoss Missile) |
5 Contact Damage 3 Projectile Damage (Loop) 5-10 Explosive Damage (Death) |
22 HP | Speed: 1.6 | 1 Pickup (100%) |
Enemy Behavior: |
||||
Crystal Caves |
||||
Spider |
3 Contact Damage | 18 HP | Speed: 4.6 | 9 Rads 1 Pickup (30%) 1 Weapon Drop (2%) |
Enemy Behavior: |
||||
|
Laser Crystal |
20 Contact Damage 1-2 Damage per Laser |
45 HP | Speed: 1.1 | 22 Rads 1 Pickup (35%) 1 Weapon Drop (5%) |
Enemy Behavior: |
||||
|
Lightning Crystal |
20 Contact Damage 2 Damage per Lightning |
45 HP (Base) 47 HP (Loop 1) |
Speed: 1.4 | 25 Rads 1 Pickup (45%) 1 Weapon Drop (5%) |
Enemy Behavior: |
||||
|
Hyper Crystal |
200 Contact Damage | 550 HP (Base) 770 HP (Loop 1) |
Speed: 1.1 | 150 Rads 3 Pickups (100%) |
Enemy Behavior: |
||||
Frozen City |
||||
Snow Bandit
|
3 Projectile Damage | 8 HP | Speed: 2.6 | 4 Rads 1 Pickup (16%) |
Special Spawn: Enemy Behavior: |
||||
Snowbot |
4 Charge Damage | 15 HP | Speed: 2.6 7.6 (Dash) |
4 Rads 1 Pickup (40%) 1 Weapon Drop (8%) |
Enemy Behavior: |
||||
Wolf |
2 Contact Damage 3 Projectile Damage |
12 HP | Speed: 3.1 4.6 (Dash) |
5 Rads |
Enemy Behavior: |
||||
Snowtank |
3 Projectile Damage 5-10 Explosive Damage (Death) |
50 HP | Speed: 1.1 | 8 Rads 2 Pickups (50%) |
Enemy Behavior: |
||||
Gold Snowtank
|
3 Projectile Damage 4 Contact Damage (Missile) 5-10 Explosive Damage (Missile & Death) |
70 HP | Speed: 1.1 | 13 Rads 2 Pickups (50%) |
Spawning: Enemy Behavior: |
||||
Lil Hunter
|
3 Projectile Damage 1 Damage per Flame 5-10 Explosive Damage (Death) |
140 HP | Speed: 3.6 | 20 Rads 1 Pickup (200%) |
Enemy Behavior: |
||||
Labs |
||||
Freak |
3 Contact Damage | 7 HP | Speed: 3.6 | 1 Rad 1 Pickup (10%) |
Special Spawning: Enemy Behavior: |
||||
Explo Freak
|
2 Contact Damage 5-10 Explosive Damage (Death) |
5 HP | Speed: 2.6 | 9 Rads 1 Pickup (60%) |
Enemy Behavior: |
||||
Rhino Freak
|
5 Contact Damage | 80 HP | Speed: 0.6 | 17 Rads 1 Pickup (50%) 1 Weapon Drop (20%) |
Enemy Behavior: |
||||
Necromancer
|
None | 6 HP | Speed: 2.6 | 7 Rads 1 Pickup (60%) |
Enemy Behavior: |
||||
| Turret |
3 Projectile Damage | 40 HP | Speed: 0 | 1 Rad 1 Pickup (40%) |
Enemy Behavior: |
||||
Technomancer
|
None | 350 HP (Base) 490 HP (Loop 1) |
Speed: 0 | 50 Rads 2 Pickups (100%) |
Enemy Behavior: |
||||
Palace |
||||
Guardian
|
2 Contact Damage 5 Projectile Damage |
35 HP | Speed: 0.2 | 11 Rads 1 Pickup (50%) |
Enemy Behavior: |
||||
Explo Guardian
|
2 Contact Damage 2 Projectile Damage |
50 HP | Speed: 2.6 | 16 Rads 1 Weapon Drop (30%) |
Enemy Behavior: |
||||
Dog Guardian
|
6 Contact Damage | 160 HP | Speed: 0.5 7.0(Jump) |
20 Rads 2 Pickups (60%) |
Enemy Behavior: |
||||
The Nuclear Throne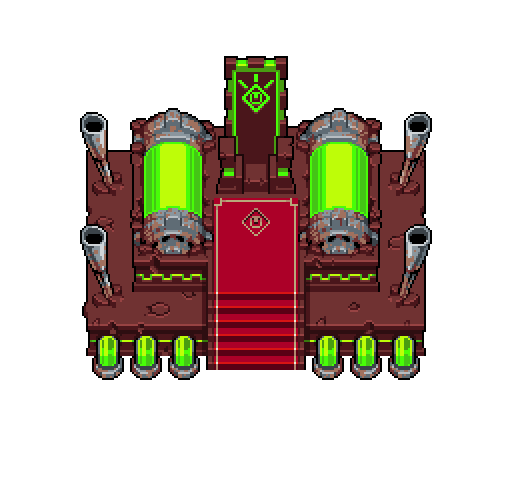
|
10 Contact Damage (Damage Goes Here) |
1500 HP | Speed: 2.3 | 200 Rads |
Enemy Behavior: |
||||
Campfire |
||||
Throne II |
10 Contact Damage (Damage Goes Here) |
600 HP (Base) 800 HP (Loop 1) |
Speed: 5.1 | 100 Rads 2 Pickups (100%) |
Enemy Behavior: |
||||
Misc |
||||
Mimic |
3 Contact Damage | 12 HP | Speed: 0 | 6 Rads 2 Pickups (200%) |
| (Mechanics) | ||||
Weapon Mimic |
4 Contact Damage | 15 HP | Speed: 0 | 15 Rads 1 Weapon (100%) |
| Added on update 100. | ||||
|
Health Mimic (Super Mimic) 
|
4 Contact Damage | 15 HP | Speed: 0 |
15 Rads 2 Pickups (200%) + 1 Guaranteed Health Pickup |
| (Mechanics) | ||||
|
Hostile Horror (Enemy Horror) 
|
4 Contact Damage (Beam Damage Goes Here) |
60 HP | Speed: 4.1 | 25-115 Rads |
| (Mechanics) | ||||
IDPD |
||||
IDPD Spawning Mechanics: During preloop, normal IDPD units will appear when opening an IDPD chest, opening a Proto Statue, taking a crown (including crown start), and are a part of Palace's spawn pool. They will also appear in any area while playing as Rogue. During loop IDPD will additionally spawn during every level, and can include any normal units, elite units, and Vans. IDPD have a 0% chance of being elite during Loop 0, a 20% chance of being elite during Loop 1, and a 40% chance of being elite during Loop 2. Starting from Loop 3, all IDPD units will always spawn in as Popo Freaks instead, with the exception of Vans. (Campfire seems to follow the logic from the previous loop, meaning that no elites are seen on 0-1 L1, and no Popo Freaks are seen on 0-1 L3.) Spawn Exceptions: IDPD will never spawn in Y.V.'s Crib, 7-3 and HQ3. Crown Vaults themselves do not have IDPD spawns unless if playing as Rogue. Vans do not spawn at the Campfire. |
||||
Grunt |
3 Projectile Damage 8-16 Explosive Damage (Grenade) |
8 HP | Speed: 2.6 4.6 (Roll) |
1 Pickup (40%) |
| (Mechanics) | ||||
Inspector
|
5 Projectile Damage 8-16 Explosive Damage (Grenade) |
10 HP | Speed: 2.6 | 1 Pickup (60%) |
| (Mechanics) | ||||
Shielder
|
3 Projectile Damage (Shield Damage Goes Here) |
45 HP | Speed: 3.1 | 1 Pickup (60%) |
| (Mechanics) | ||||
Elite Grunt
|
3 Projectile Damage 4 Contact Damage (Missile) 8-16 Explosive Damage (Missile) |
40 HP (Base) 42 HP (Loop 1) |
Speed: 2.6 6.6 (Roll) |
1 Pickup (80%) |
| (Mechanics) | ||||
Elite Inspector
|
8 Melee Damage 8-16 Explosive Damage (Grenade) |
40 HP (Base) 42 HP (Loop 1) |
Speed: 3.1 | 1 Pickup (100%) |
| (Mechanics) | ||||
Elite Shielder
|
(Damage Goes Here) | 100 HP (Base) 105 HP (Loop 1) |
Speed: 3.1 | 1 Pickup (100%) |
| (Mechanics) | ||||
Van |
20 Contact Damage (Drive) 8-16 Explosive Damage |
250 HP (Base) 262 HP (Loop 1) |
Speed: 8.0 (On spawn) |
3 Pickups (100%) |
| Vans can be entered once per run to enter HQ and once to exit HQ. In Loop 3 they start exploding instead, which will kill the Popo Freaks inside. | ||||
Captain |
3 Projectile Damage (Bullet) 12 Projectile Damage (Orb) 10 Charge Damage |
1100 HP (Base) 1540 HP (Loop 1) |
Speed: 0 13.6 (Dash) |
None |
Enemy Behavior: |
||||
Popo Freak
|
5 Contact Damage 3 Projectile Damage 8-16 Explosive Damage (Grenade) |
30 HP (Base) 34 HP (Loop 3) |
Speed: 4.1 | 25 Rads 1 Pickup (60%) |
| All IDPD spawns in as Popo Freaks permanently starting from 1-1 Loop 3. | ||||
Secret |
||||
Crown Guardian
|
12 Projectile Damage (Large Orb) 5 Projectile Damage (Normal Orb) |
70 HP | Speed: 0.2 | 12 Rads 1 Pickup (100%) |
Enemy Behavior: |
||||
Bonefish
|
2 Contact Damage | 6 HP | Speed: 3.6 | 2 Rads |
Enemy Behavior: |
||||
Crab |
3 Contact Damage 2 Projectile Damage |
12 HP | Speed: 4.1 | 3 Rads 1 Pickup (30%) |
Enemy Behavior: |
||||
Turtle |
4 Contact Damage | 15 HP | Speed: 4.6 | 12 Rads 1 Pickup (80%) |
Enemy Behavior: |
||||
Molefish
|
3 Projectile Damage | 6 HP | Speed: 3.1 | 3 Rads 1 Pickup (12%) |
Enemy Behavior: |
||||
Molesarge
|
1 Projectile Damage | 14 HP | Speed: 3.1 | 6 Rads 1 Pickup (80%) |
Enemy Behavior: |
||||
Fireballer
|
3 Projectile Damage | 25 HP | Speed: 1.6 | 5 Rads 1 Weapon Drop (10%) |
Enemy Behavior: |
||||
Super Fireballer
|
1 Contact Damage 3 Projectile Damage |
60 HP | Speed: 1.1 | 15 Rads 2 Pickups (40%) |
Enemy Behavior: |
||||
Jock |
2 Contact Damage 4 Contact Damage (Missile) 5-10 Explosive Damage (Missile) |
25 HP | Speed: 2.6 | 8 Rads 1 Pickup (20%) |
Enemy Behavior: |
||||
Cursed Spider
|
3 Contact Damage | 18 HP | Speed: 4.6 | 16 Rads 1 Pickup (20%) |
Enemy Behavior: |
||||
|
Cursed Laser Crystal |
20 Contact Damage (Laser Damage Goes Here) |
45 HP | Speed: 1.1 | 25 Rads 1 Pickup (40%) |
Enemy Behavior: |
||||
Jungle Bandit
|
1 Projectile Damage | 9 HP | Speed: 3.6 |
5 Rads 1 Pickup (18%) |
Enemy Behavior: |
||||
Jungle Assassin
|
5 Melee Damage | 12 HP | Speed: 3.6 |
8 Rads (20 Rads while hiding) 1 Pickup (60%) (No pickups while hiding) |
Enemy Behavior: |
||||
Jungle Fly |
5 Contact Damage 1 Projectile Damage (Maggot) |
40 HP | Speed: 1.6 3.6 (Rage) |
10 Rads 1 Weapon Drop (20%) |
Enemy Behavior: |
||||
| Gun God (Yung Venuz)  |
3 Projectile Damage (Bullet) (Damage Goes Here) |
700 HP | Speed: X | 3 Golden Weapons (100%) |
Enemy Behavior: |
||||
Halloween Bandit
|
3 Projectile Damage | 4 HP | Speed: 2.6 | 2 Rads 1 Pickup (16%) |
| Can spawn in addition to normal Bandits during the Halloween event only. | ||||